


How to clean fridge coils? To clean the refrigerator’s air conditioner coils, you will need to unplug the refrigerator, then remove the panel from the back of the fridge to access the coils. Then, use a cleaning brush to clean the dirty coils to remove dust. You can also use compressed air to clean the refrigerator, which makes it easier to clean from the inside out.
Signs of dirty coils include the compressor getting hot, increasing electricity bills, and food spoiling faster than usual.
Cleaning your refrigerator coils might not be glamorous, but it pays off in energy savings, reliable performance, and a longer appliance life. In this guide, you’ll learn a straightforward, step-by-step process—backed by industry best practices—that even a DIY novice can follow.
Why Coil Maintenance Matters
- Expert Insight: Dust and pet hair clog coils, forcing your fridge’s compressor to overwork. HVAC technicians agree that routine cleaning prevents strain and premature wear.
• Efficiency Boost: A clean coil system can cut energy use by up to 25%. Lower consumption means smaller utility bills and a reduced carbon footprint.
• Reliability & Longevity: Regular upkeep avoids sudden breakdowns and extends your fridge’s operational lifespan, saving both money and hassle.
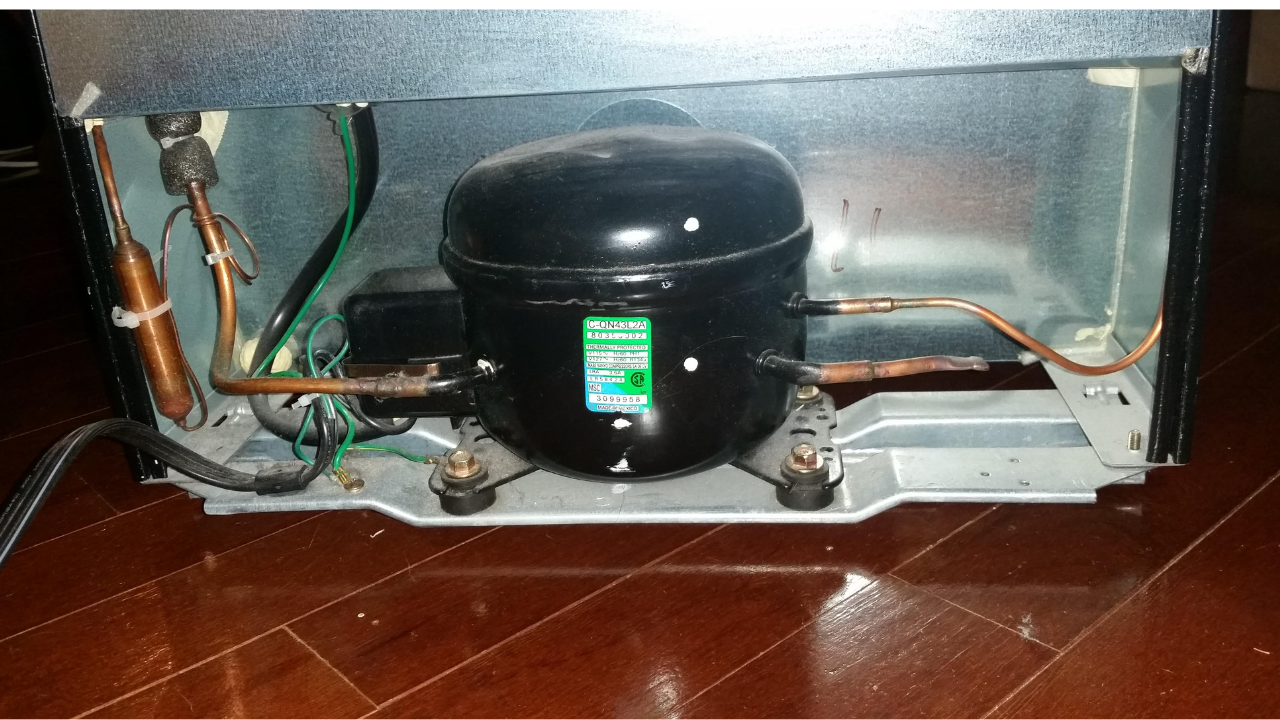
Signs Your Coils Need Attention
- The refrigerator cycles constantly or never seems to cool properly
- The compressor housing feels unusually warm
- Noticeable rise in electricity bills without added use
- Food spoils faster than normal
- Visible layer of dust or debris on coil fins
Essential Tools & Materials
- Vacuum cleaner with a brush or crevice attachment
- Coil cleaning brush or soft bristle brush
- Microfiber cloths
- Screwdriver (for protective panel removal)
- Flashlight
- Compressed air canister (optional for tight spots)
Pro Tip (Trust): Always unplug the fridge and let the coils cool for at least 10 minutes before you start
🔍 Step-by-Step Cleaning Process
1. Unplug the Refrigerator
Safety first! Disconnect your fridge from the power source to prevent any electrical hazards. Wait about 10–15 minutes to allow the coils to cool down.
- Locate the Coils
Depending on your refrigerator model, the coils are either:
- At the back: Common in older models. Pull the fridge away from the wall to access.
- Underneath the front: Common in newer models. Remove the kick plate or grille at the bottom front
If unsure, consult your owner’s manual or look for a grid-like metal structure
- Initial Cleaning with Vacuum
Use the vacuum cleaner with a brush or crevice attachment to remove loose debris. Be gentle to avoid damaging the coils. Work in slow, deliberate motions, and use a flashlight to ensure thorough cleaning
- Deep Cleaning with a Brush
For stubborn dirt, use a coil cleaning brush to gently scrub the coils. Brush in the direction of the fins to prevent bending. Avoid using water or chemical cleaners directly on the coils, as they can cause corrosion
- Optional: Vinegar Solution
For a deeper clean, mix equal parts distilled white vinegar and water in a spray bottle. Lightly spray the coils and let them sit for 5 minutes. Wipe with a microfiber cloth to remove any remaining grime. Ensure the coils are completely dry before proceeding
- Clean Surrounding Areas
Vacuum and wipe down the floor beneath and around the fridge to prevent dust from recirculating. If you removed a grille or panel, clean it with mild soap and water before reattaching.
- Reassemble and Restore Power
Once everything is clean and dry, reattach any panels or grilles, plug the refrigerator back in, and return it to its original position. Monitor the appliance for the next 24 hours to ensure it’s operating efficiently.
📅 Maintenance Schedule
- Every 6 months: General recommendation for most households.
- Every 3 months: If you have pets or live in a dusty environment.
- Annually: At a minimum, to maintain efficiency and prevent issues
Additional Best Practices
- Check and seal door gaskets to prevent air leaks.
- Maintain interior temperature at 35–38°F (1.7–3.3°C) and freezer at 0°F (-18°C).
- Avoid overloading shelves to allow proper airflow.
When to Call a Professional (Authority)
If you notice persistent overheating, strange noises, or cooling issues after cleaning, a certified appliance technician can diagnose compressor or refrigerant concerns. Trust experts to handle complex repairs safely and reliably.
FAQS:
- What is the best way to clean refrigerator coils?
Unplug the fridge, expose the coils (rear or under-front), use a vacuum with a brush attachment to remove loose dust, then gently scrub with a soft coil brush. Finish by wiping with a dry microfiber cloth. - How do you unblock a refrigerator coil?
Turn off and unplug the unit, use compressed air or a narrow crevice tool to dislodge lodged debris, then vacuum and brush until air can flow freely through the coil fins. - What happens if you don’t clean fridge coils?
Coils clogged with dust force the compressor to overwork, raising energy bills, shortening appliance life, and risking premature breakdowns. - How do I know if my refrigerator coil is dirty?
Look for a visible layer of dust/hair on the fins, feel a constantly hot compressor, notice longer cooling cycles, or see unexplained spikes in your electricity bill.